Django Get Date of When File Uploaded Model
In your application or project at that place is always a requirement for uploading a file data. This file information could be in a specific format depending on your requirement. Here I am going to explain you how you tin upload single or multiple files in your python based Django framework. I am assuming y'all accept a basic knowledge on Python and Django framework earlier you continue farther. I am also going to show you how to implement CSRF token for uploading files.
In Django framework the file data is placed into request.FILES. Y'all need a FileField form that a view will handle this grade and this form volition receive file information in request.FILES which is a lexicon containing a cardinal for each FileField. So let'southward say if your course has an input field with proper noun file and form has an attribute enctype="multipart/form-data", then file data tin be accessible as asking.FILES['file']. If your class does not accept attribute enctype="multipart/form-information" then request.FILES['file'] volition be empty.
Let's get into the coding role.
Prerequisites
Python 3.ix.0, Django 3.1.2
Project Setup
The kickoff thing you need to create projection directory. The project name is djangofilesupload which you lot will create using the following command.
django-admin startproject djangofilesupload Side by side step is to create an app inside the to a higher place project directory to perform files upload operations. Create an app chosen filesupload using the post-obit control. Make certain you lot execute the following command from the project's root directory djangofilesupload, because you are going to create the post-obit app directory under the project's root directory.
django-admin startapp filesupload The required project and app structures will be created.
Now you demand to add thisfilesupload app into the project settings. So edit the filedjangofilesupload/djangofilesupload/settings.py and add the following line into INSTALLED_APPS section at the finish:
INSTALLED_APPS = [ ... 'filesupload.apps.FilesuploadConfig', ] The above line is formed using the filedjangofilesupload/filesupload/apps.py. Y'all will see the FilesuploadConfig class in this file with the name = 'filesupload'.
Template or View File
The template or view file is nada but y'all write code on HTML file what you want to brandish on UI (User Interface). For this file upload functionality I am going to put but one field that is file which will be used for browsing and selecting file or files.
<!DOCTYPE html> <html> <head> <title>Django - Single File Upload</championship> </caput> <body> <div fashion="width: 500px; margin: auto;"> <fieldset name="Single File Upload"> {% if msg %} {% autoescape off %} {{ msg }} {% endautoescape %} {% endif %} <form method="postal service" action="/" enctype="multipart/form-data"> {% csrf_token %} <dl> <p> <label>Browse and select a file</characterization> <input type="file" name="file" autocomplete="off" required> </p> </dl> <p> <input blazon="submit" value="Upload"> </p> </grade> </fieldset> </div> </body> </html> The proper name of the above template file is single.html and put it nether filesupload/templates directory.
In the above template file I am showing bulletin if at that place is any from the server once file is uploaded. I take also turned autoescape off if there is any HTML tag coming from server side. Otherwise your HTML tags, for example, having < or > will be converted into < and > respectively. This is correct output in the HTML page but your corresponding DOM object will not exist created.
Let's say if your server is sending response as shown below:
<span style="colour: light-green;">File successfully uploaded</span> And if you practice not plow machine escape off then yous will see the post-obit result once your file successfully uploaded to the server location.

The some other important thing is yous need to ready CSRF token on the form using {% csrf_token %} otherwise you lot won't be able to upload file and you would get the post-obit errors:
CSRF token is not ready CSRF Token missing or incorrect You besides need to ensure to check the CSRF token on your server side code and you volition later when you become through the code in views.py file.
Class
The Django Form will map the fields to form on your template file. In the above template or view file I take kept but ane field called file which is used to select a file. A view treatment this grade volition receive data into request.FILES.
request.FILES volition but contain information if the HTTP request method is Mail, at least one file is posted and the respective form has an attribute enctype="multipart/form-data", considering dealing with forms that have FileField and ImageField fields are more complex.
The following code snippets are written into form.py file nether directory filesupload.
from django import forms class UploadFileForm(forms.Form): file = forms.FileField() Past default files volition be uploaded into project's root directory. If you want to alter the destination for upload then yous can pass every bit shown below:
file = forms.FileField(upload_to='your directory name/') Views
In this view I am going to bear witness how to upload file into a server location. You will also encounter how file data is passed from request to Grade. Here as well notice how I have used CSRF decorator to ensure the CSRF token.
from django.http import HttpResponseRedirect from django.shortcuts import return from .forms import UploadFileForm from django.views.decorators.csrf import ensure_csrf_cookie @ensure_csrf_cookie def upload_file(request): if request.method == 'Post': form = UploadFileForm(request.Mail service, request.FILES) if class.is_valid(): handle_uploaded_file(asking.FILES['file']) context = {'msg' : '<span mode="color: green;">File successfully uploaded</bridge>'} render return(request, "single.html", context) else: form = UploadFileForm() return render(request, 'unmarried.html', {'form': form}) def handle_uploaded_file(f): with open(f.proper noun, 'wb+') as destination: for chunk in f.chunks(): destination.write(chunk) Note that you have to pass asking.FILES into the Form's constructor to bind the file data into a Course.
Looping over UploadedFile.chunks() instead of using read() ensures that large files don't overwhelm your system's memory.
Ideally the function handle_uploaded_file() should exist put into common utility file, merely only for the sake of this instance I accept kept into the same file filesupload/views.py.
Before y'all save the file onto disk the uploaded file data is stored under the tmp folder and the file name is generated something similar tmpzfp414.upload. If the file size is upwardly to 2.5 MB then file is not saved nether the tmp folder and entire content is read from the memory and the reading becomes very fast.
URLs
Now you lot need to define the path or URL which will phone call the advisable part (for this instance, upload_file()) on your views.py file. You demand to create a file urls.py under filesupload folder with the following code snippets.
from django.urls import path from django.conf import settings from . import views urlpatterns = [ path('', views.upload_file, name='upload_file'), ] The path() office is passed 4 arguments, two required: road and view, and two optional: kwargs, and name.
route is a cord that contains a URL pattern.
view calls the specified view function with an HttpRequest object as the beginning argument and whatsoever "captured" values from the road as keyword arguments.
kwargs are arbitrary keyword arguments tin be passed in a lexicon to the target view.
proper name – naming your URL lets you refer to it unambiguously from elsewhere in Django, specially from within templates.
Another important affair you lot need to do is to configure the URL into the project. This (filesupload) is an app and your project does not know anything about this URL. So add together the following line into djangofilesupload/djangofilesupload/urls.py file under urlpatterns = [...].
path('', include('filesupload.urls')), Deploying Application
Now I am ready to test the app I have built. Permit's fire upward the server from the command line usingmanage.py runserver. The application will run on default port8000. If you want to alter the default host/port of the server and so you tin read tutorial How to change default host/port in Django.
Testing the Application
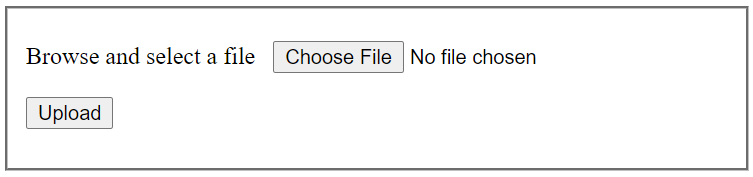
When you hitting URL http://localhost:8000 on browser, your abode page looks similar to the following image:
Once you select and click on Upload push button y'all will see the success message as shown below:
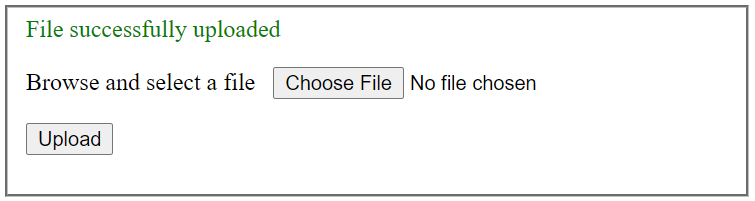
The file gets uploaded into the project's root directory djangofilesupload.
Multiple Files Upload
The above example has shown you how to upload single file using the scan push button. Hither I am going to explain you how to upload multiple files using the single browse button.
Here I am going to create a separate template or view file (filesupload/templates/multiple.html) for user interface (UI).
<!DOCTYPE html> <html> <head> <title>Django - Multiple Files Upload</title> </head> <torso> <div style="width: 500px; margin: auto;"> <fieldset name="Multiple Files Upload"> {% if msg %} {% autoescape off %} {{ msg }} {% endautoescape %} {% endif %} <form method="mail" activity="/multiple" enctype="multipart/form-information"> {% csrf_token %} <dl> <p> <characterization>Browse and select one or more files</label> <input blazon="file" name="files" autocomplete="off" required multiple> </p> </dl> <p> <input blazon="submit" value="Upload"> </p> </form> </fieldset> </div> </torso> </html> Y'all need to add another entry to the forms.py file every bit shown below for multiple files. So the file field is used to upload single file and files field is used to upload multiple files.
from django import forms class UploadFileForm(forms.Class): file = forms.FileField() files = forms.FileField(widget=forms.ClearableFileInput(attrs={'multiple': True})) You need to modify the views.py and add together the following function into information technology.
@ensure_csrf_cookie def upload_multiple_files(request): if request.method == 'POST': form = UploadFileForm(request.POST, request.FILES) files = asking.FILES.getlist('files') if form.is_valid(): for f in files: handle_uploaded_file(f) context = {'msg' : '<span manner="color: greenish;">File successfully uploaded</bridge>'} return return(request, "multiple.html", context) else: form = UploadFileForm() return return(request, 'multiple.html', {'form': form}) Y'all need to update the file filesupload/urls.py to add another path for uploading multiple files.
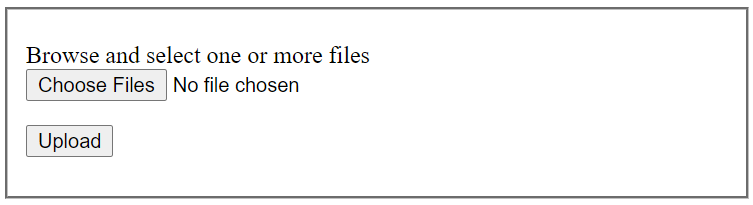
path('multiple', views.upload_multiple_files, name='upload_multiple_files'), So y'all're done with coding. Let'southward test it. Hitting the URL http://localhost:8000/multiple in the browser will display the following page:
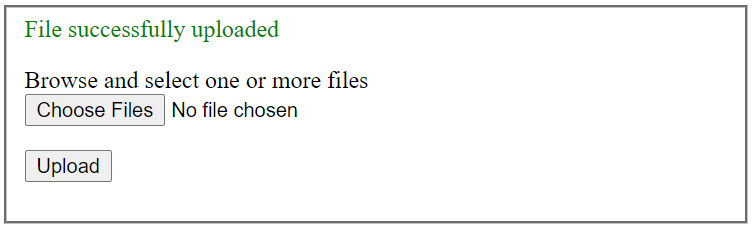
Now select one or more than files to upload. Once successfully uploaded you will see the following page.
Hope you got idea how to upload single and multiple files using Django framework. You may too read of other ways of uploading files into server.
Source Lawmaking
Download
dalrympleyoungold.blogspot.com
Source: https://roytuts.com/single-or-multiple-files-upload-example-in-django-framework/
0 Response to "Django Get Date of When File Uploaded Model"
Post a Comment